I will admit that there is proberly a few improvements that could me made to this tutorial and the end product so if you've got any thoughts on this feel free to comment. By the way, I am a bit of an amateur and this is my first tutorial so excuse my lack of technical terminology.
A quick word of advice to any newbies in Maya, make sure you edit all the names of polygon shapes and nodes as you go, otherwise things will soon get messy.
If you get stuck at any point in this tutorial comment on one of the posts explaining the problem and leaving a point of contact, and I will get back to you asap.
For this Project you will need an Earth Colour Map, an Earth Night Map, a Cloud Transparency Map, a Specular Map and a Bump Map. These can all be found and downloaded by clicking this link; http://planetpixelemporium.com/earth.html
If you want some higher res maps, check out Nasa's Blue marble/visible earth collection
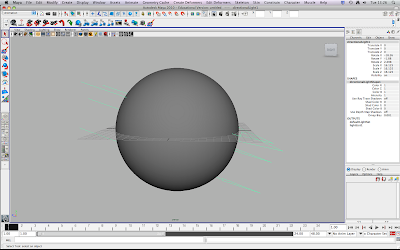
1. Start by creating a polygon primitives - sphere, adjust the subdivision to 50 and scale by 250.
2. Apply a new lambert to this sphere.
3. Add a directional light, under attributes uncheck emmit specular and rename diffuse_directional_light. Duplicate and do the opposite to step three, name this specular_directional_light.
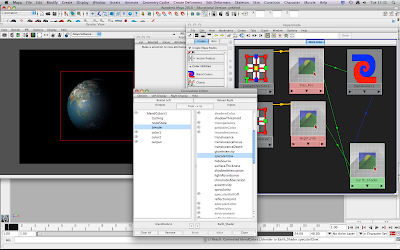
4. Now apply a ramp shader to your earth_shader. Use a bright and a dark colour to replicate how the light falls on the sphere. Set to V Ramp and facing angle.
5. Once the ramp shader matches the directional light, replace the day map file to lighter colour and the same with the night to the dark.
6. Create a blend colour node from colour utilities in the hypershade, plug the day map into one colour and blue as the other, set the blender to 0.9.
7. Apply the blend colour to the specular glow of the earth_shader.
8. Place a new file call it specular_file, then plug the specular map into the colour and plug the specular_file.outcolour to the earth_shader.specularcolour.
9. Create a bump map using the bump file plug into the bump map on the earth_shader. Set the Bump value to 0.1.
10. Attach the Luminance.outvalue to the earth_shader.glowintensity.
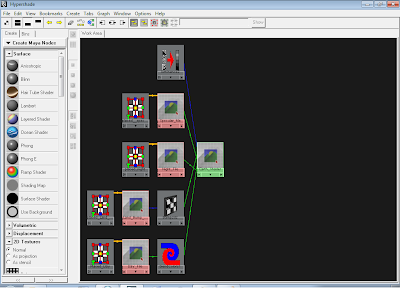
The last image shows how your Earth Graph Network in the Hypershade should be looking.


This comment has been removed by the author.
ReplyDeleteHi, im trying to follow your tutorial, but when you said on step 4 "Now apply a ramp shader to your earth_shader" I got lost. When did you create the earth_shader ? Could you explain please ? I really want to finish your tutorial, great results. Thanx ;D
ReplyDeletecontact: jave.quinte@gmail.com
Hi! I like your tutorial but I'm stuck with the step 4. Can you explain me exactly what and where I should click to make ramp shader. I really need to finish the project soon, so I'm in hasty. Also I am relatively a beginner, so I hope you will understand my questions. Thank you in advance :)
ReplyDeletecontact: jegorovicb@gmail.com
ReplyDeleteI appreciate this tutorial very much as there are few tutorials published on this issue. It gives very good professional idea how to construct the globe. To make this tutorial really more understandable it would be good to explain many details.
ReplyDeleteI stuck on point 4 - where is the facing angle?
point 5. Day map - night map - where are they?
point 8 - place a new file - where? - obviously in the hypershader - then plug the specular map into the color - how to plug it - and plug the specular_life.outcolor? to the earth_shader.specularoutcolor - this already becomes Chinese text.
Please introduce more details in this part of the tutorial so that we could continue next to enjoy your work. Otherwise like many other tutorials we start and through it in the middle as it become unmanageable.
My best wishes
adanchev@yahoo.com
hi.im stuck at step 4.can u clearly explain the lighting and hypershade.
ReplyDeletethax.
swapnika80@gmail.com
hi am having the same problem as everyone else for step 4 and onwards.. Can you explain it to me please..
ReplyDeleteThank you
yennaris.a@gmail.com
I have tried to do this tutorial it makes no sense it never renders out, this is impossible. I have done this entire tutorial several times but it never renders out.. I have changed my render settings to everything including hardware texturing and it doesn't render like it shows in my viewer.... a.j.brownproductions@gmail.com
ReplyDeletethis tutorial isnt for noobs. that is why all of you are having problems. it works just fine. Yes the descriptions are vague, but so is the world
ReplyDeleteThey are VERY vague indeed, step 4 assumes that you have knowledge of how to built an Earth Shader.
DeleteHello... I'm having the same problem as everyone else for step 4. Can you explain it to me? :D
ReplyDeleteThank you in advance.
lestari_ok@yahoo.com
Hey having the same problems with number 4. What is the Earth shader?
ReplyDeletemark.grody@gmail.com
You can find the Ramp Shader by right clicking on the object and from the menu that appears, go down to "Assign Favorite Material" and then from the small menu that appears, select Ramp Shader.
ReplyDeleteHi I just saw this post and I was also wondering about step 5. The day and night map file?. I know maya converts all textures to a map file for rendering. Is this what u meant? Or were u meaning to change the blend modes in the render layers for the day and night maps. Also I was wondering do we plug the ramp for the earth shader into the color channel and plug the earth textures into the ramp? I can b reached at danielhall736@gmail.com
ReplyDelete